
Store-bought cat trees can be pricey, wobbly, or just plain ugly, especially once you try to find one that fits your space and your cat’s habits. The good news is you can build a DIY cat tree that looks better, feels sturdier, and costs a lot less, often in a single afternoon.
This step-by-step guide is for beginners who’ve got basic tools (a drill, a saw, and a measuring tape help) and a small budget. You’ll end up with a stable, wide base, one or two sisal-wrapped scratching posts, and 2 to 3 simple platforms your cat can climb, perch on, and nap.
Plan on about 2 to 4 hours for a straightforward build, plus a little extra time if you’re cutting wood from scratch. If you can use scraps, the total cost is often under $50, and it can be much less if you already have carpet remnants and leftover lumber.
Before you start, focus on safety first. Keep the structure stable, sand rough edges, and make sure screws, staples, and sharp corners stay fully hidden so paws and whiskers don’t get snagged.
Plan your cat tree before you cut anything
A DIY cat tree goes smoother when you plan it like a small piece of furniture, not a craft project. A quick design choice, a few safe size rules, and a simple cut list can save you from wasted wood, extra store trips, and a wobbly finished build. Keep your first build basic and sturdy, then add “fun stuff” after the frame feels rock solid.
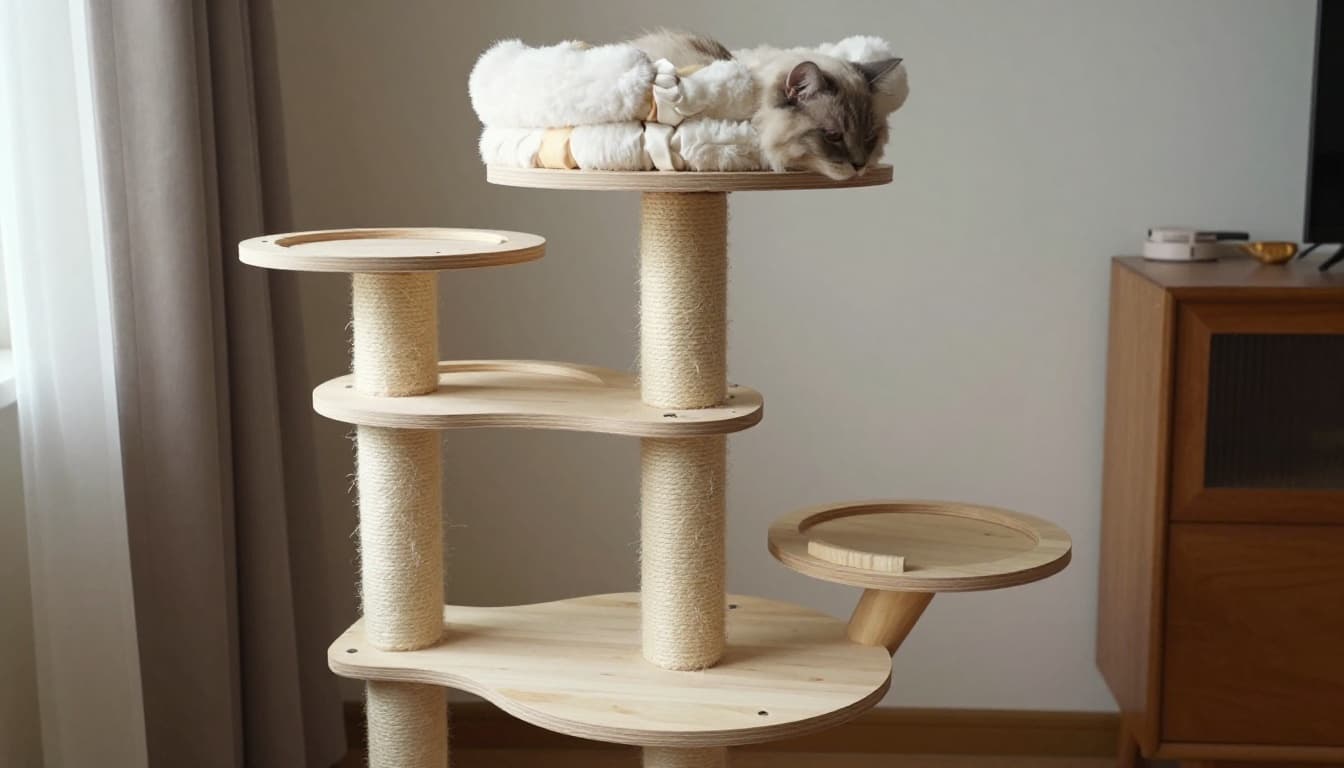 An example of a simple tower-style cat tree with a wide base and a few easy platforms (created with AI).
Pick a simple design that matches your cat (and your room)
Start with how your cat actually moves. Some cats want height and views, while others want easy steps and a cozy hideout. For beginners, these options stay simple without feeling boring:
- Basic tower (2 to 4 platforms): The best first build for most homes. It works great for kittens and adult cats, and it fits small apartments if you keep the base wide and the height reasonable. Put it near a window if possible, but leave enough space to vacuum around it.
- Cat condo add-on (box or tube): Add a small “hide” space for shy cats or multi-cat homes where someone needs a break. A simple cube or sturdy tube under a platform also adds weight down low, which helps stability.
- Branch-style look (only if securely bolted): This can look amazing, but only do it if you can bolt through solid wood and prevent twisting. Branches that shift even a little can make the whole tree feel sketchy, so keep the structure overbuilt.
- Step-style for older cats: Think “stairs,” not “jumps.” This design is perfect for seniors, heavier cats, or anyone with stiff joints. It also works well in narrow spaces because you can build it long and low.
Whatever style you choose, check your ceiling height and walkways first. Keep it away from doors that swing open, and don’t park it next to shelves full of breakables. If you want inspiration without copying someone else’s plan, browse a few beginner layouts like these free DIY cat tree plans.
If you’re torn between tall and stable, pick stable. Cats avoid wobble more than you’d think.
Choose safe, cat friendly dimensions
A good DIY cat tree feels like a small tree trunk, not a bar stool. That comes down to a wide base, reasonable height, and platform spacing your cat can handle.
Use these beginner-friendly guidelines:
- Base size: About 24 by 24 inches or larger for stability. Go bigger (closer to 30 inches square) if you have a big cat or a multi-cat home.
- Platform size: About 12 to 18 inches wide. Bigger platforms feel more secure for lounging, especially for larger cats.
- Post height: 3 to 4 feet for a simple build. For beginners, keep it under 5 feet until you’ve built a few sturdy projects.
Spacing matters as much as size. Aim for levels that let your cat step up without a huge launch. As a rough guide, 10 to 15 inches between levels suits seniors and cautious cats, while 15 to 20 inches works for most adult cats.
Wider bases and a lower center of gravity prevent tipping because the weight stays spread out. In other words, you want “heavy and grounded,” not “tall and skinny.”
Make a quick sketch and a cut list
You don’t need perfect drafting skills. Draw a simple front view and write measurements next to each piece. Then turn that sketch into a shopping and cutting checklist, so every cut has a job.
A basic cut list usually includes:
- Base pieces (often 1 to 2 layers of plywood)
- Number of posts (usually 1 to 3 for a small build)
- Number of platforms (2 to 4 is plenty)
- Covering material (carpet, fabric, or carpet tiles)
- Sisal rope length (measure post height and add extra for overlap)
- Fasteners (wood screws, washers, brackets if needed)
Label your drawing like a map. Mark platforms as Level 1, Level 2, Level 3, then circle the exact spots where posts attach. That tiny step makes assembly faster and prevents the classic mistake of drilling a post hole where your screws will collide later. For more planning ideas, this DIY cat tree guide also explains the basic build flow and common parts.
Materials and tools checklist (what to buy, what to avoid)
A sturdy DIY cat tree is mostly a smart shopping list. If you choose strong wood, scratch-friendly rope, and the right fasteners, the build goes faster and the finished tree feels like a solid piece of furniture. If you cheap out on the wrong parts, you can end up with wobble, peeling carpet, or sharp hardware finding its way to paws.
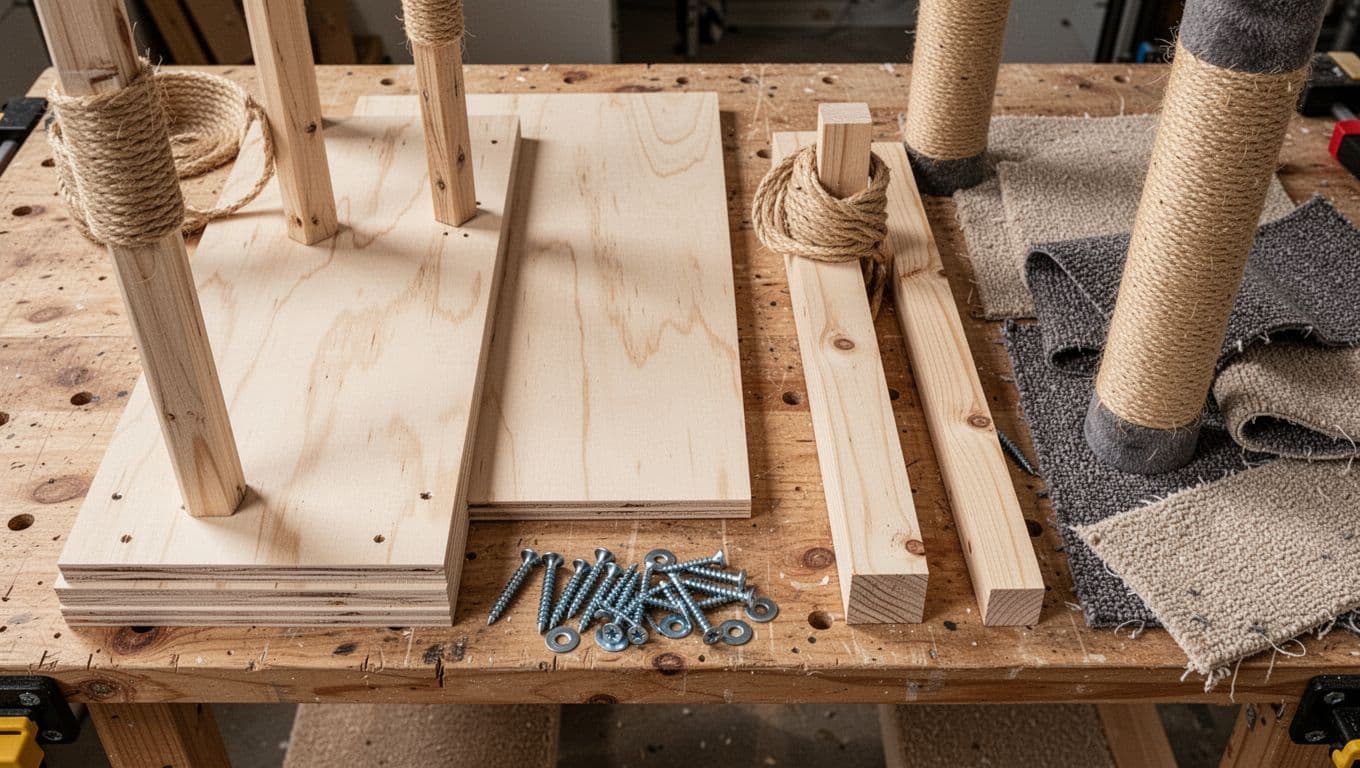 Common DIY cat tree materials laid out together (created with AI).
Wood, posts, and a base that will not tip over
For most beginner builds, 1/2-inch plywood is the sweet spot for platforms. It is stiff enough to hold a jumping cat, but still easy to cut and drill. In the US, a 4×8 sheet of basic 1/2-inch plywood often lands around $20 to $30, so you can usually get a full tree out of one sheet (plus scraps).
The safest stability upgrade is a double-layer plywood base. Glue and screw two base pieces together so the bottom has more weight and less flex. Think of it like boots versus socks, the heavier, wider footprint keeps the whole tree planted when your cat launches upward.
For posts, pick 2×4 lumber or another solid wood post if you can. Thick cardboard tubes can work for budget builds, but wood is sturdier and holds screws better over time.
A quick material reality check:
- Good choices: 1/2-inch plywood platforms, double-layer base, 2×4 posts (or thick tubes as a temporary swap).
- MDF: It can work, but it is heavy, and it can swell if it gets wet. It also strips more easily if you over-tighten screws.
- Avoid: thin particleboard, flimsy cardboard, or narrow bases that make a tall tree feel top-heavy.
Budget tip: Ask a local flooring shop for carpet remnants, or use scrap plywood from a reuse store. Many cuts do not need “pretty” wood once they are wrapped and covered.
If the base feels oversized, keep it. A wide base is what stops a cat tree from acting like a tipping bar stool.
Rope and fabric that hold up to scratching
For scratch posts, sisal rope (or hemp rope) holds up best. Aim for 1/4-inch to 1/2-inch thickness. For a small tree with one post, about 50 feet is a common starting point, then add extra if you are wrapping multiple posts.
When you shop, look for:
- A tight twist that feels dense in your hand.
- No fraying right off the roll.
- Untreated natural fiber (skip anything with strong odor, dye, or chemical treatment).
If you want a deeper comparison of textures, Catster’s sisal rope vs. sisal fabric breakdown explains why some cats prefer one over the other.
For platform coverings, you have options. Carpet remnants grip claws and feel familiar. Felt and upholstery fabric look cleaner and shed less hair. If your cat loves scratching the couch, a tighter fabric might actually get targeted, so carpet can be the “sacrificial” choice.
Fasteners and adhesives that are strong and pet safe
Plan on 2-inch wood screws for attaching posts to the base and platforms. Add washers when screwing through carpet or fabric so the head does not pull through. Also, countersink or recess screw heads so metal stays hidden and paws do not catch.
Use wood glue at major joints, and hot glue only for tacking sisal rope as you wrap. Avoid nails since they can loosen with repeated shaking and climbing. Skip strong-smelling adhesives and solvent-based products.
Let all glue cure fully before your cat uses the tree, especially if your cat likes to chew. For extra guidance, this overview of pet-safe glue options is a helpful reference.
Tools you need, plus easy workarounds if you do not have them
Most builds only need a basic set of tools: a drill with a screwdriver bit, a saw (hand saw, jigsaw, or circular saw), a staple gun, sandpaper, a tape measure, a pencil, and scissors or a utility knife.
 Photo by cottonbro studio
No saw? Many hardware stores will cut plywood for you. You can also borrow, rent, or use a simple hand saw with patience. If you do not have a power sander, wrap sandpaper around a small wood block and smooth every edge your cat might rub against.
Safety is simple but non-negotiable: wear eye protection, clamp your work when you can, and always cut away from your hands. Just as important, check for loose staples after covering platforms because one proud staple can turn into a sharp hazard.
Step by step: build a simple 3 level DIY cat tree
This is the part where your DIY cat tree stops being “a pile of materials” and starts looking like something your cat will actually trust. Go slow, measure twice, and keep running quick stability checks as you build. A cat tree should feel like a sturdy stool, not a wobbly microphone stand.
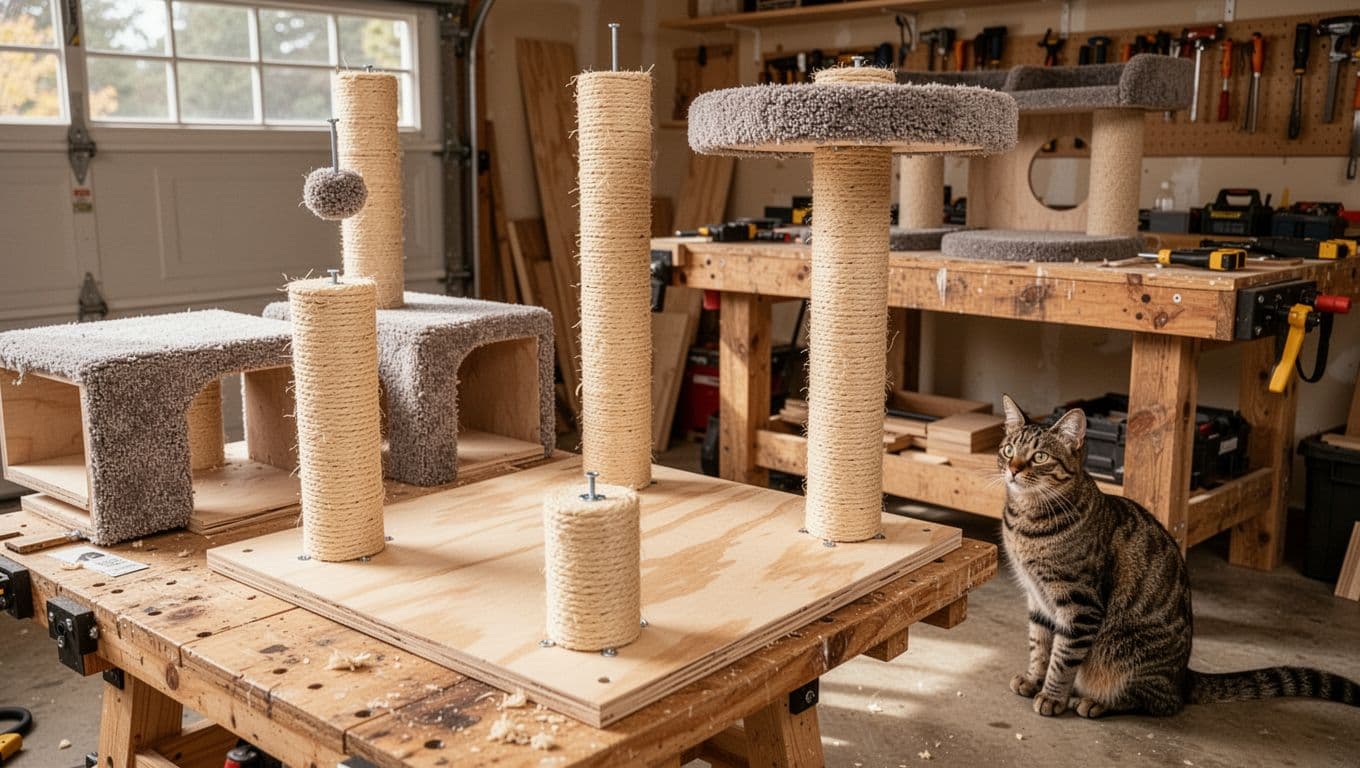 An in-progress DIY cat tree build with posts attached and platforms ready to mount (created with AI).
Build and wrap the base so it stays flat and stable
A solid base is the “foundation slab” of your cat tree. If you nail this part, everything else gets easier. Start with two base squares, about 24 by 24 inches each, cut from plywood. If your cat is large (or you have two cats), going bigger is never a bad move.
Here’s a simple, beginner-friendly base build:
- Cut two matching squares (about 24 by 24 inches). If your cuts aren’t perfect, stack them and sand the edges flush later.
- Spread wood glue across one square (a zig-zag works well).
- Stack the second square on top, then clamp if you can.
- Pre-drill and screw them together (a few screws around the perimeter and some in the middle). Keep screws a couple inches in from the edge to avoid splitting.
- Sand the edges and corners until they feel smooth to the touch. Your cat will rub cheeks on this, so it matters.
Now cover it with carpet or durable fabric. Carpet is forgiving and hides scuffs. Upholstery fabric can look cleaner, but make sure it’s thick enough to take staples.
To wrap the base cleanly (without bulky corners):
- Lay your carpet/fabric face down, then set the base on top.
- Leave 2 to 3 inches of extra material around all sides.
- Cut small corner notches so the fabric folds like wrapping a present, not like a crumpled paper bag. Think “remove a tiny square,” not “slice all the way in.”
- Pull one side snug and staple on the underside. Then do the opposite side. Repeat for the other two sides.
- Add extra staples near corners and along the middle where cats tend to kick off.
 A wide, double-layer plywood base being wrapped and stapled neatly underneath (created with AI).
Checkpoint: test for rocking. Set the base where you plan to use it. Push down on each side and each corner. It should stay flat, with no teetering.
If it rocks:
- Check staples first. A staple that didn’t sink can hold a corner up.
- Sand a high edge if one corner is slightly proud.
- Add stick-on furniture pads on the underside. They’re great on slightly uneven floors, especially older hardwood.
A base that rocks now becomes a cat tree that shakes later. Fix the base before you build upward.
Prep the posts and wrap them tight with sisal
Posts are your vertical “trunks.” For a simple 3-level DIY cat tree, cut 2 to 3 posts from 2×4 lumber (or sturdy posts), usually 3 to 4 feet long total depending on your design. You can use one taller main post plus one or two shorter support posts, or keep all posts similar and stagger platforms.
Before you touch the rope, do quick prep:
- Sand all corners and edges where the rope will sit. Sharp corners make wrapping harder and can wear the rope faster.
- Wipe off dust so glue sticks better.
Now wrap with sisal rope. This is the difference between a scratch post cats love and one they ignore. You want tight wraps with no gaps, like winding a bandage around a finger.
A simple wrapping method that holds up:
- Anchor the start: Put a blob of hot glue near the bottom of the post and press the rope end into it.
- Wrap upward with firm tension. Pull the rope as you wind so each turn presses against the last.
- Add hot glue every few inches (think: a dot or short line, not a flood). This keeps it from loosening over time.
- Fix gaps as soon as you see them. Unwind 3 to 6 turns, then rewrap tighter. Waiting makes the whole post look sloppy.
- Secure the end where paws can’t reach: tuck the final rope end under the top or bottom edge and fasten it on an underside area with a staple or a short screw.
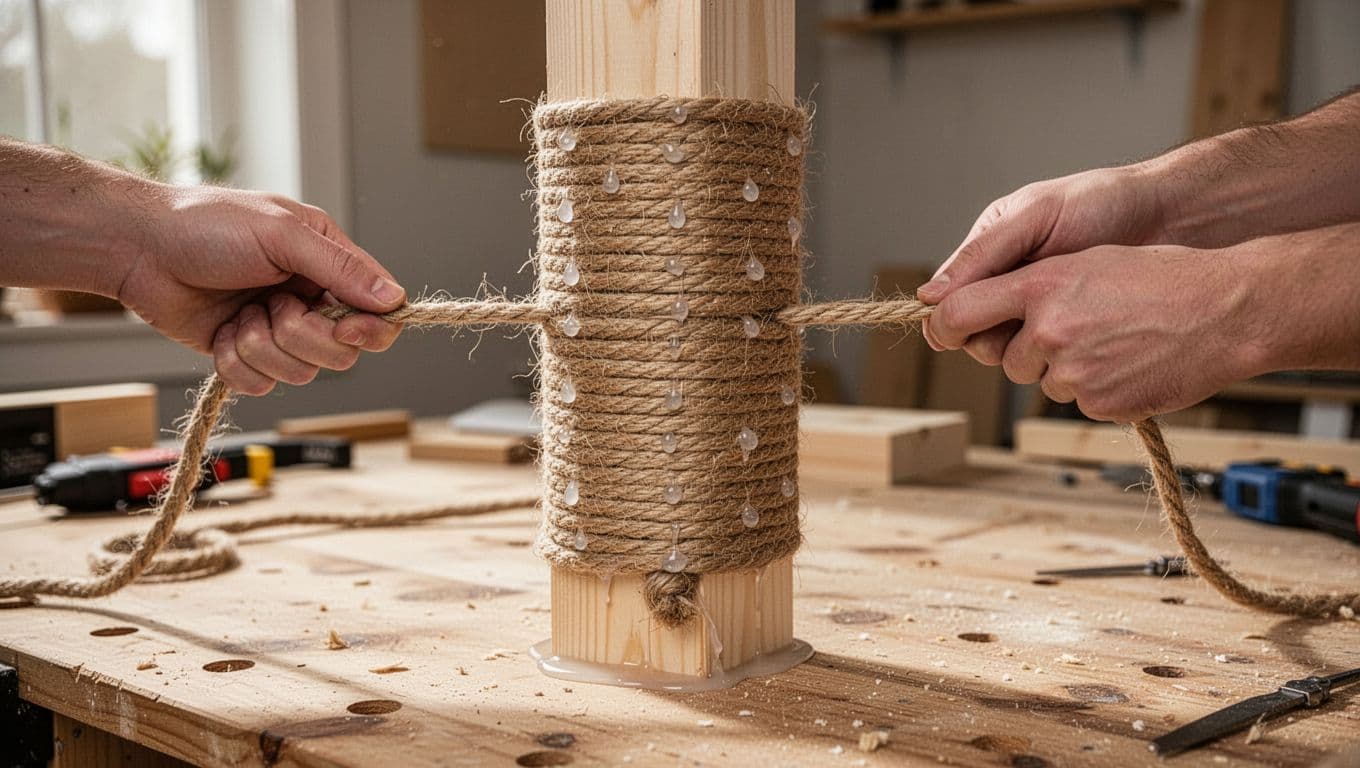 Wrapping sisal rope tightly with steady tension and small glue tacks to prevent slipping (created with AI).
Troubleshooting notes (quick fixes):
- If the rope keeps loosening, you’re not pulling hard enough. Wrap like you mean it.
- If the rope frays fast, your edges might be too sharp, sand again.
- If your cat tries to pick at the rope end, relocate the end fastener to a hidden underside spot.
For extra rope tips (including sizing and attaching), see six-step sisal rope guidance.
Attach the posts to the base without wobble
A stable cat tree feels “locked in.” The biggest mistake here is placing posts too close together. Spread them out so the base can fight tipping forces.
Start with layout:
- With two posts, place them wide apart, closer to opposite corners.
- With three posts, aim for a wide triangle. Triangles resist wobble better than a straight line.
Once you like the layout, attach posts like this:
- Mark the post locations on the base with pencil.
- Pre-drill holes through the base into the post (or at least into the post). This helps prevent splitting and makes screws pull tight.
- Use long wood screws (long enough to bite deep into the post). If you’re screwing through carpet, add washers so the screw head doesn’t sink and loosen later.
- Drive at least 2 screws per post (more is fine). Space them apart for a stronger hold.
Checkpoint: shake test. Grab the top of each post and shake it side to side. It should feel solid, with no twisting at the base.
If a post moves:
- Add another screw from a different angle.
- If it still shifts, install small corner brackets at the post base (brackets are great for fighting twist).
- If the whole tree feels tippy, you need more weight down low. The simplest fix is adding a heavier base layer (another plywood square) or making the base larger. For more ideas, these cat tree stability tips match what many builders do in real homes.
Cut, cover, and mount the platforms at safe heights
Platforms are where your cat will perch, nap, and judge you. Cut 2 to 3 platforms in simple shapes (rectangles are easiest, circles and ovals look nicer if you have a jigsaw). Aim for 12 to 18 inches wide, depending on your cat’s size.
Build the platforms in this order:
- Cut the platform pieces. Keep at least one platform a bit bigger if your cat likes to loaf.
- Sand all edges until they’re smooth. Round corners slightly so they don’t catch fabric.
- Cover with carpet or fabric, then staple underneath. Pull the covering snug so there aren’t loose bubbles.
- Plan your spacing before you screw anything down. A good beginner spacing is 12 to 16 inches between “steps” for many cats. If you have a senior cat, go closer to 10 to 12 inches.
Mounting options (both work):
- Best look: Screw from below through the platform into the post. This hides hardware on the top surface.
- Simplest: Screw down through the platform into the post, then use countersunk screws so the heads sit below the surface (and get covered by carpet).
As you mount each platform, keep checking for safe use:
- Push down on the outer edge of the platform. It shouldn’t flex much.
- Look underneath and confirm no sharp screw tips poke through.
- Run your hand over the top and underside edges to catch stray staples.
One easy upgrade: angle a platform toward a window or your cat‘s favorite hangout. Cats love “balcony seating,” and you’ll actually see them use the top levels more often.
Finishing touches, safety checks, and getting your cat to use it
Before your cat claims the penthouse, treat your DIY cat tree like a new piece of furniture that needs a final inspection. A few minutes of smoothing, tightening, and testing now prevents the classic problems later (wobble, frayed edges, and a cat that decides the couch is still “better”).

What a finished, simple DIY cat tree can look like once it’s placed near a window (created with AI).
Safety checklist before your cat climbs
Do one slow “hand sweep” over every surface. If it can snag your hand, it can snag a paw, whisker, or collar.
Here’s a simple final checklist:
- No exposed staples anywhere your cat can touch, including under platform lips.
- No sharp corners; round and sand edges until they feel dull.
- Screws are tight and recessed so heads sit below the surface.
- Fabric edges are secure underneath, with no loose flaps to chew.
- Tree does not wobble when you push hard at the top platform.
- Rope ends can’t be pulled up; anchor ends on the underside, not on an edge.
- No strong odors from glue; if you smell it, wait longer and ventilate.
Placement matters too. Keep the tree away from heaters, fireplaces, and hot vents, and avoid tight walkways where people might bump it. In multi-cat homes, stability becomes personal. Choose a bigger base and give them more than one route up so one cat can pass without a standoff (more stability tips: cat tree stability fixes).
If you can’t make it feel solid with a firm push, don’t let your cat test it at full speed.
Add simple upgrades that make it look nice and work better
Once the structure feels rock-solid, add a few “comfort and function” extras. Keep it minimal so your first build stays beginner-friendly and easy to clean.
Easy add-ons that pay off fast:
- Top bed with a raised lip (even a simple foam ring under fabric helps).
- Small hide box under a mid-level platform for naps and stress breaks.
- Dangling toy on a short string, securely attached so it can’t wrap around a neck.
- Second scratching zone (a short sisal band on a lower post catches couch-scratchers).
- Ramp for older cats with carpet for grip, set at a gentle angle.
- Removable, washable covers on favorite nap spots (Velcro or tight pillowcase-style).
Help your cat fall in love with the new cat tree
Put the tree where your cat already wants to be: near a window, near the couch where the family sits, or beside an existing scratch spot. Cats choose convenience, not your decorating plan.
Try this simple habit-building plan for the first week:
- Day 1 to 2: Rub a pinch of catnip on one post, then drop a treat on the lowest level.
- Day 3 to 4: Add treats one level higher each time, so climbing becomes a little “treasure hunt.”
- Day 5 to 7: Use a wand toy to guide gentle climbs, then pause play on the platform so the tree feels rewarding.
Praise and let them explore at their pace. Don’t place your cat on it or trap them in a cubby. If your cat ignores it, change one variable at a time: move the location, swap to a fabric they like, or add a higher perch that beats the view from the couch (more training ideas: steps to get a cat to use a cat tree).
 Photo by Florian Süß
Conclusion
A sturdy DIY cat tree comes down to a few smart moves: plan the layout first, then build a heavy, wide base that won’t rock. Next, wrap your posts with tight sisal so your cat gets a scratch spot that feels right. After that, add simple platforms at easy step-up heights, then finish with a careful safety check for exposed staples, sharp edges, and hidden screw tips. Most importantly, start simple, because you can always add a bed, a hide box, or a window-facing perch later.
To keep your cat tree solid for the long haul, do quick upkeep. Tighten screws once a month, replace rope when it starts to fray, and spot clean fabric (a weekly vacuum helps a lot, too). A clean, stable tree gets used more.
Save your cut list so you can build a second matching scratch post, or share your layout and your cat’s size in the comments so others can copy a plan that fits their space.